|
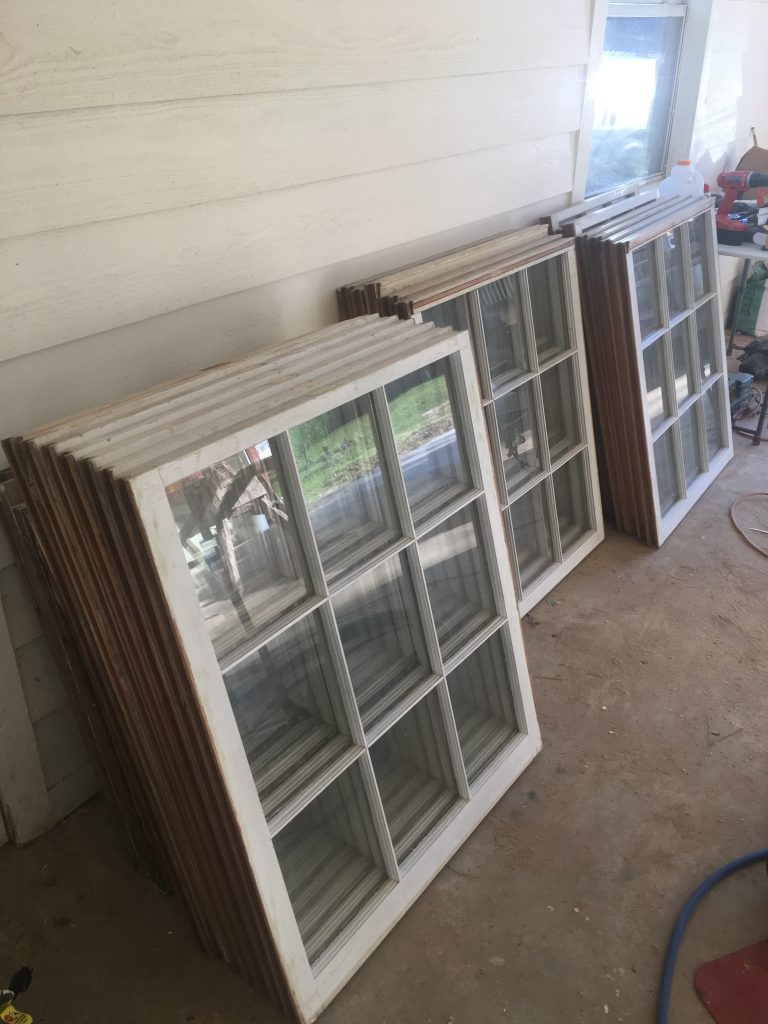
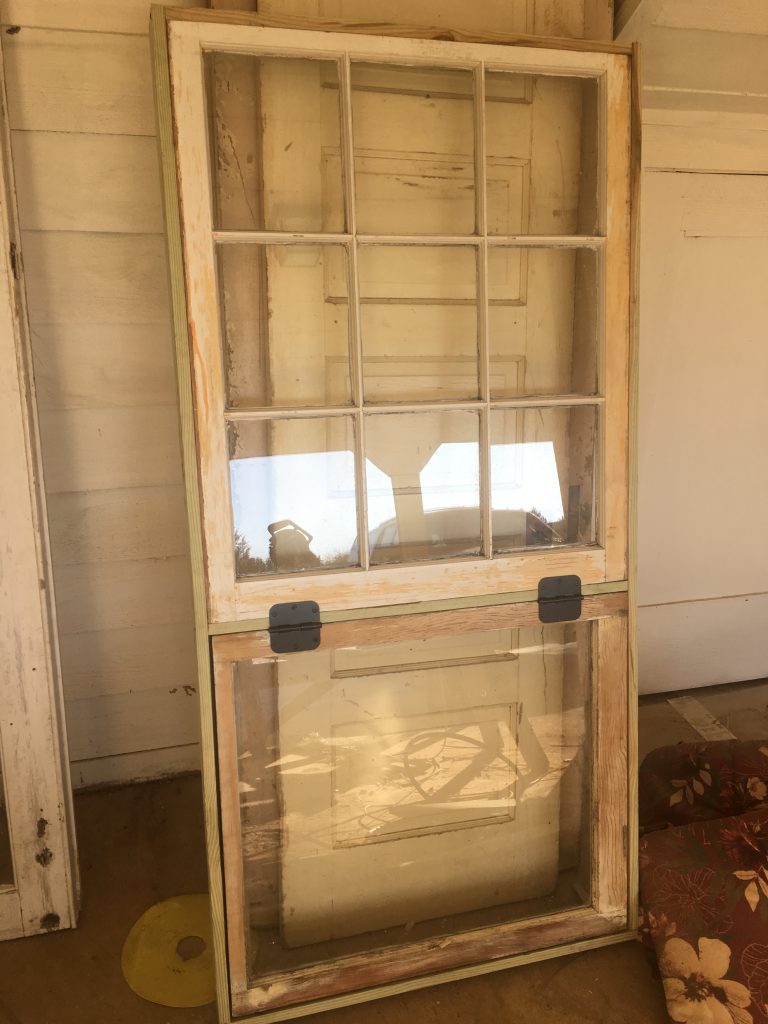
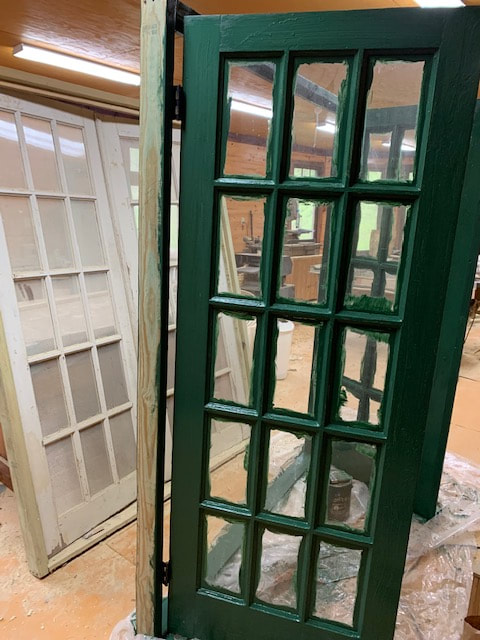
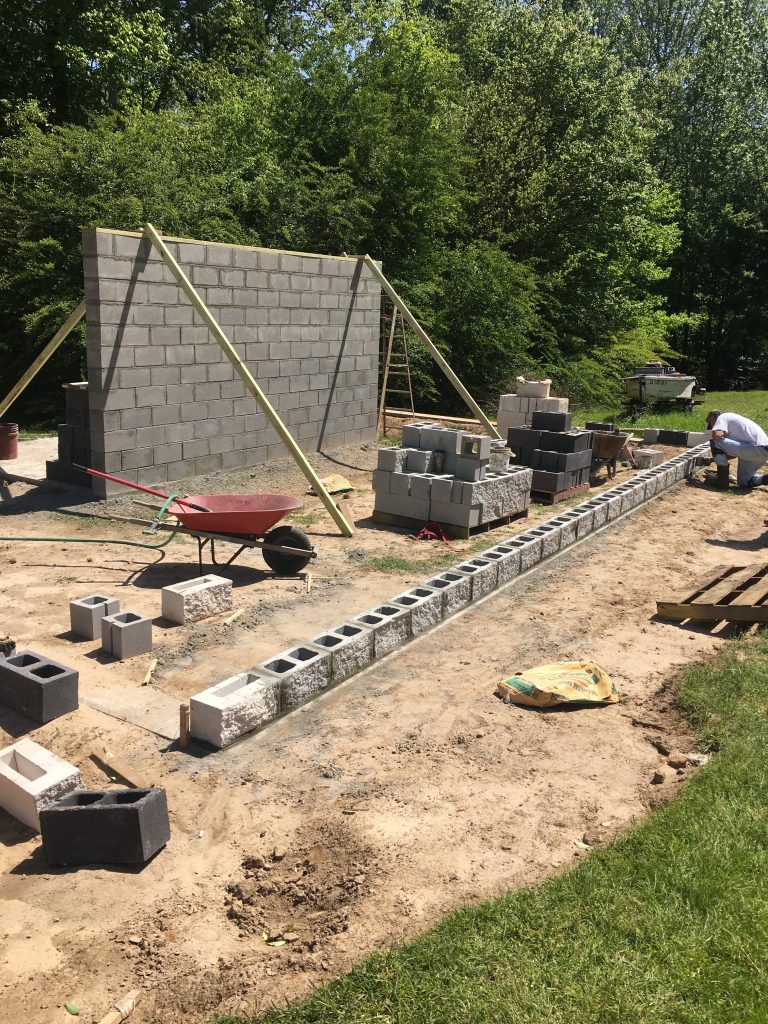
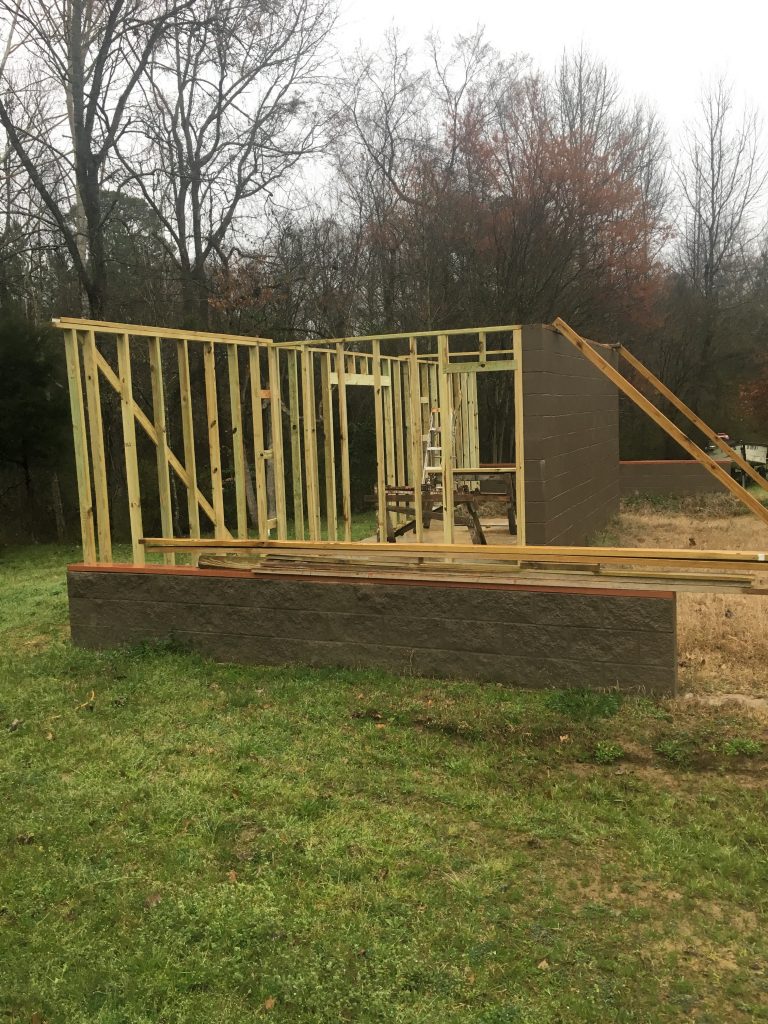
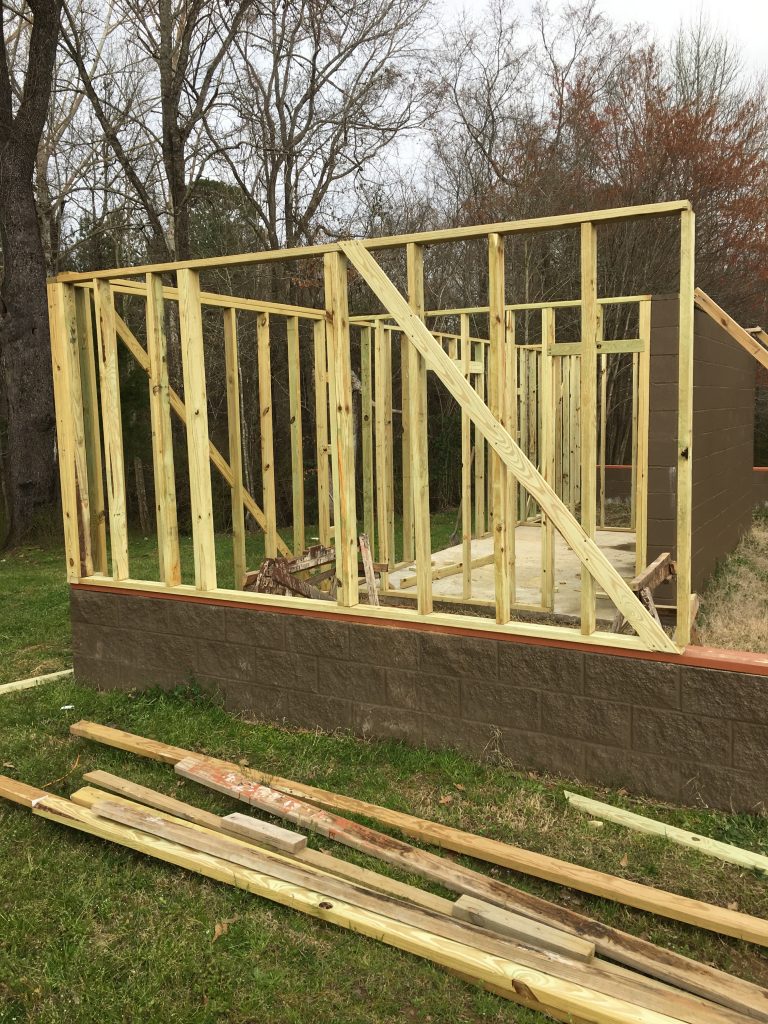
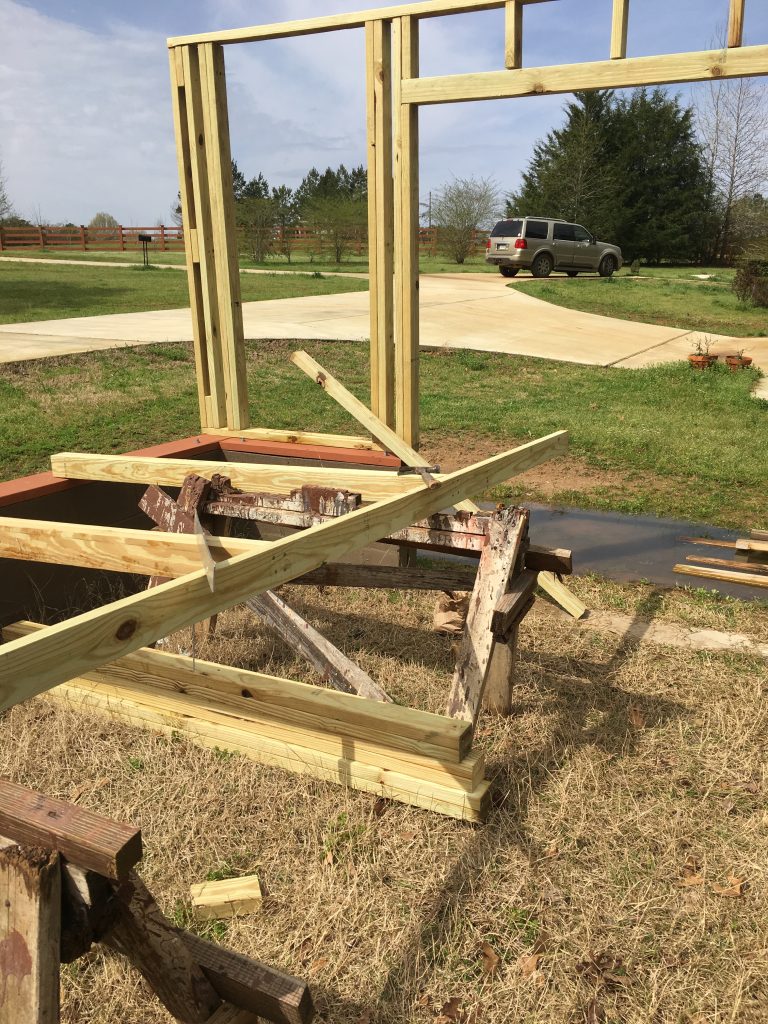
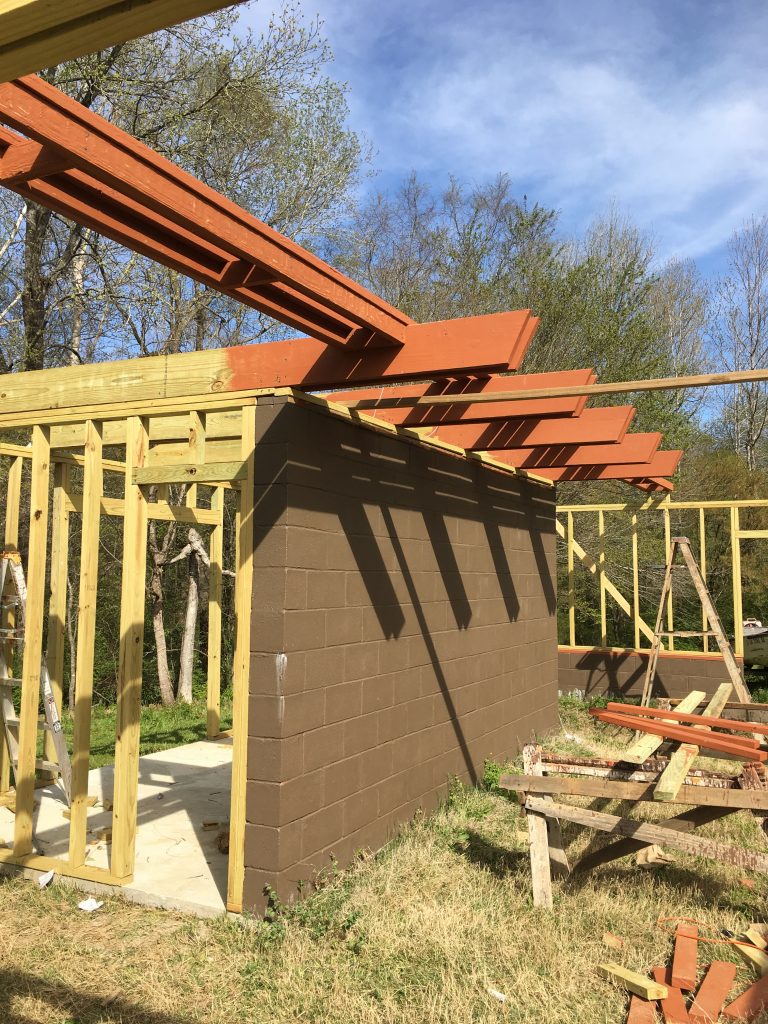
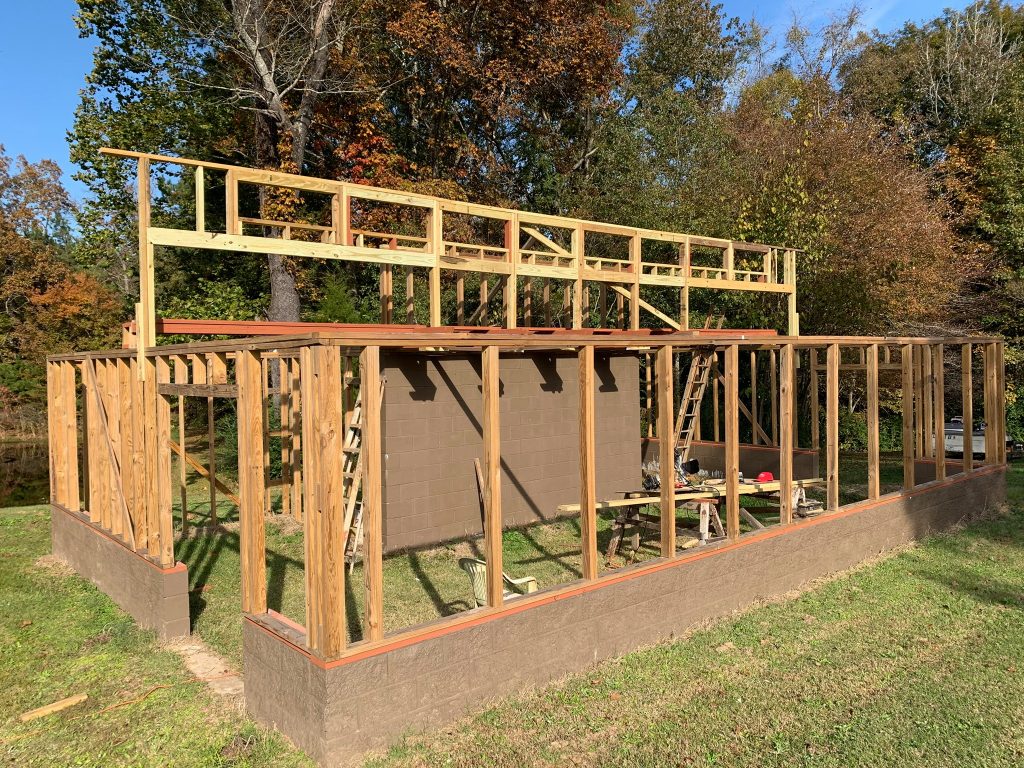
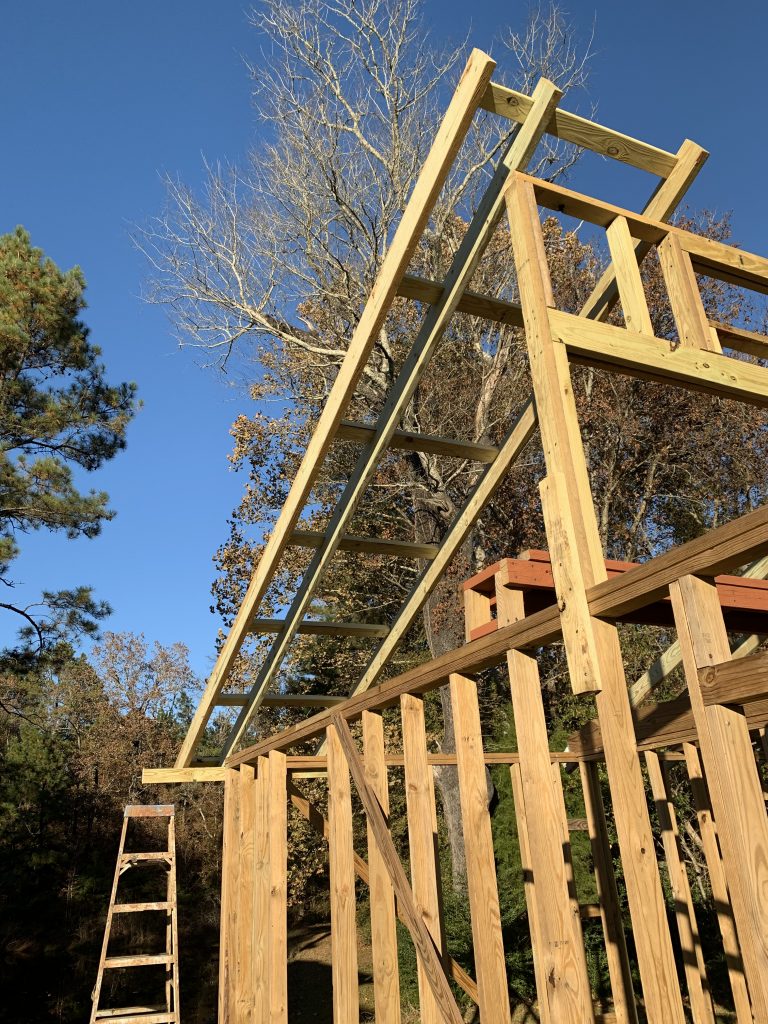
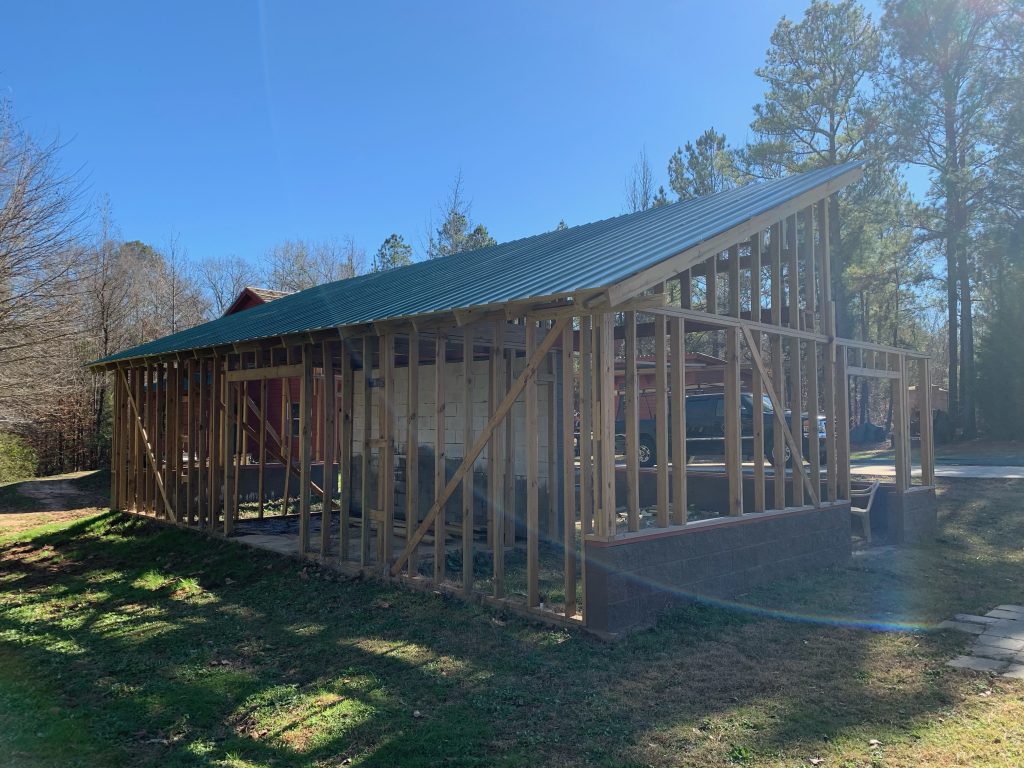
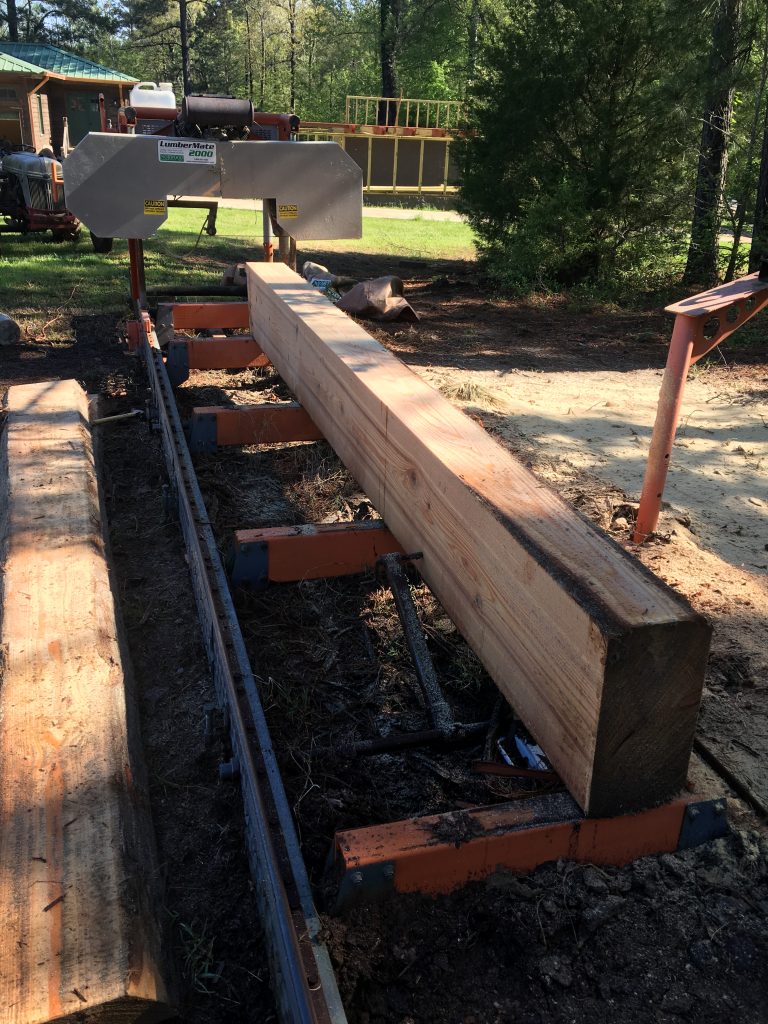
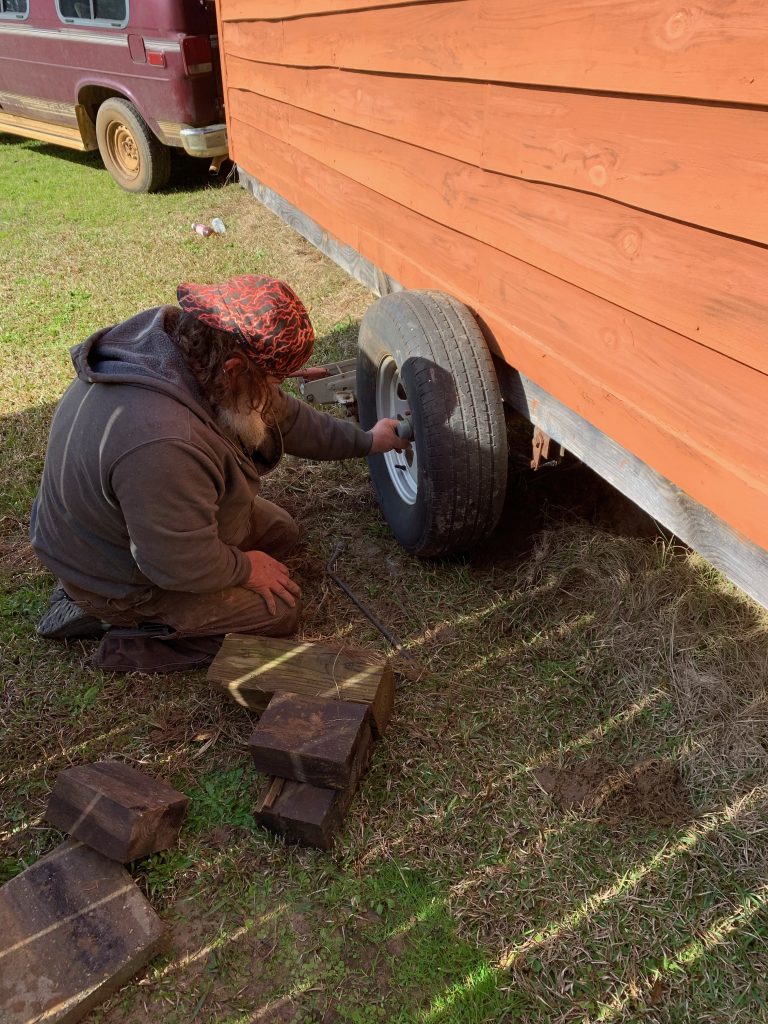
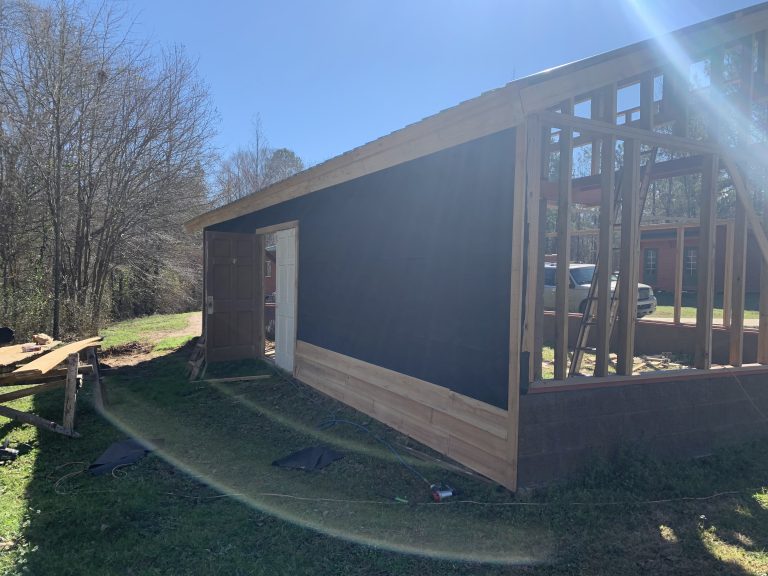
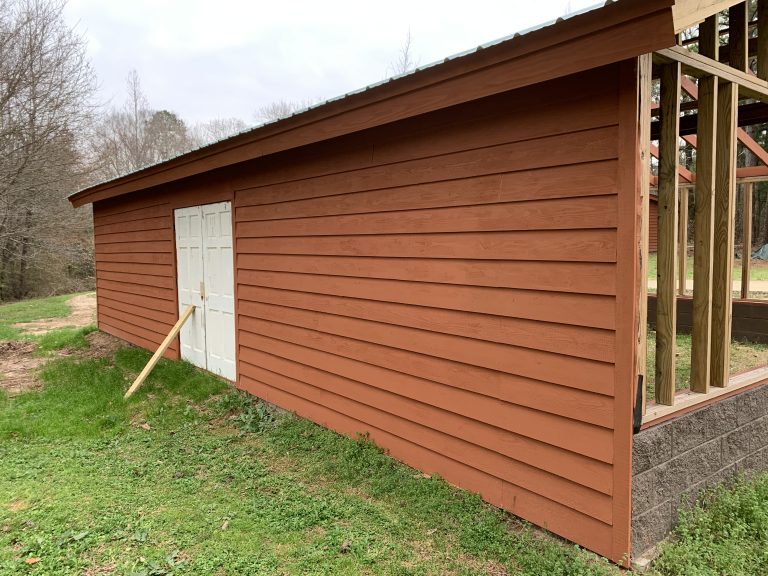
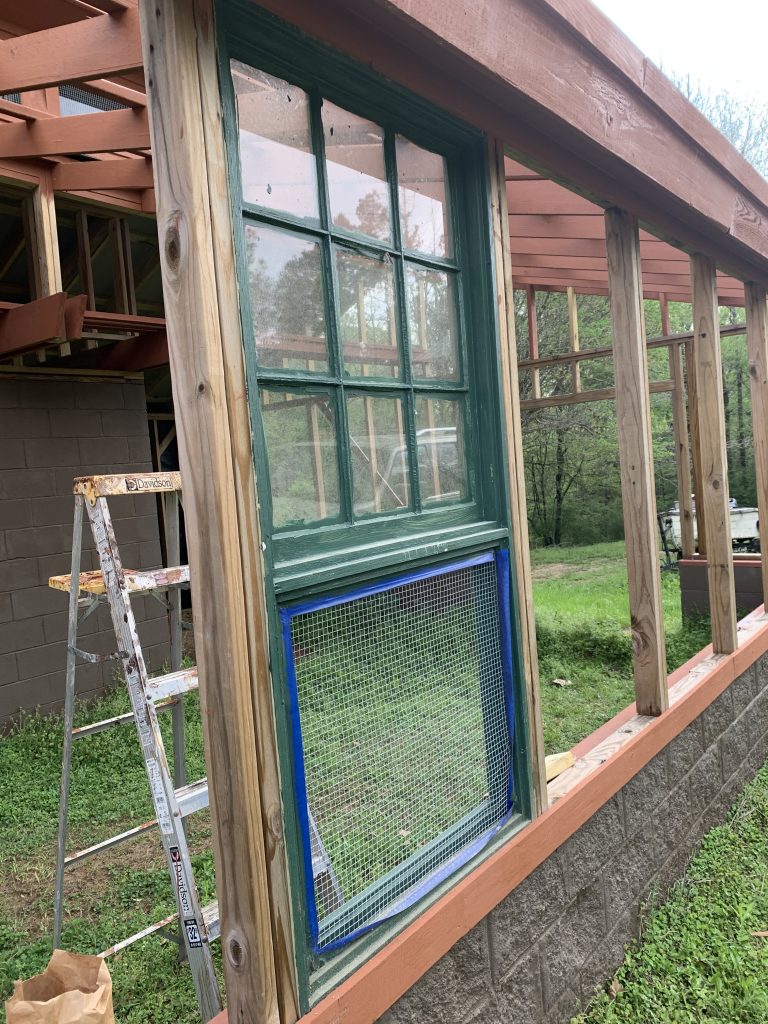
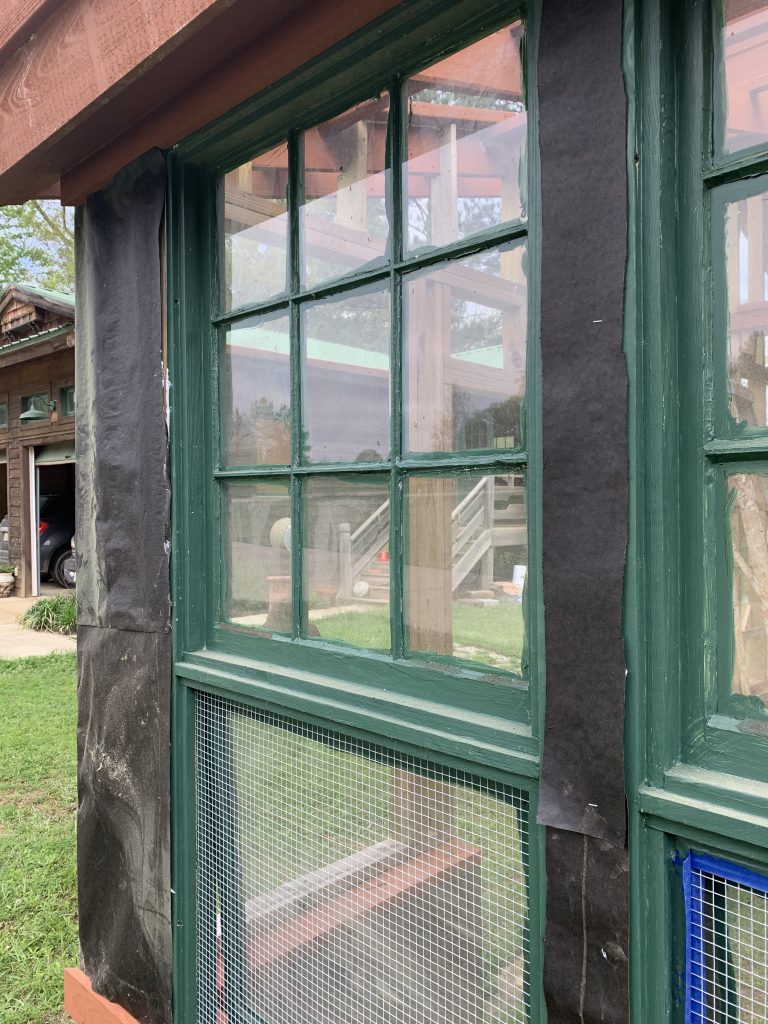
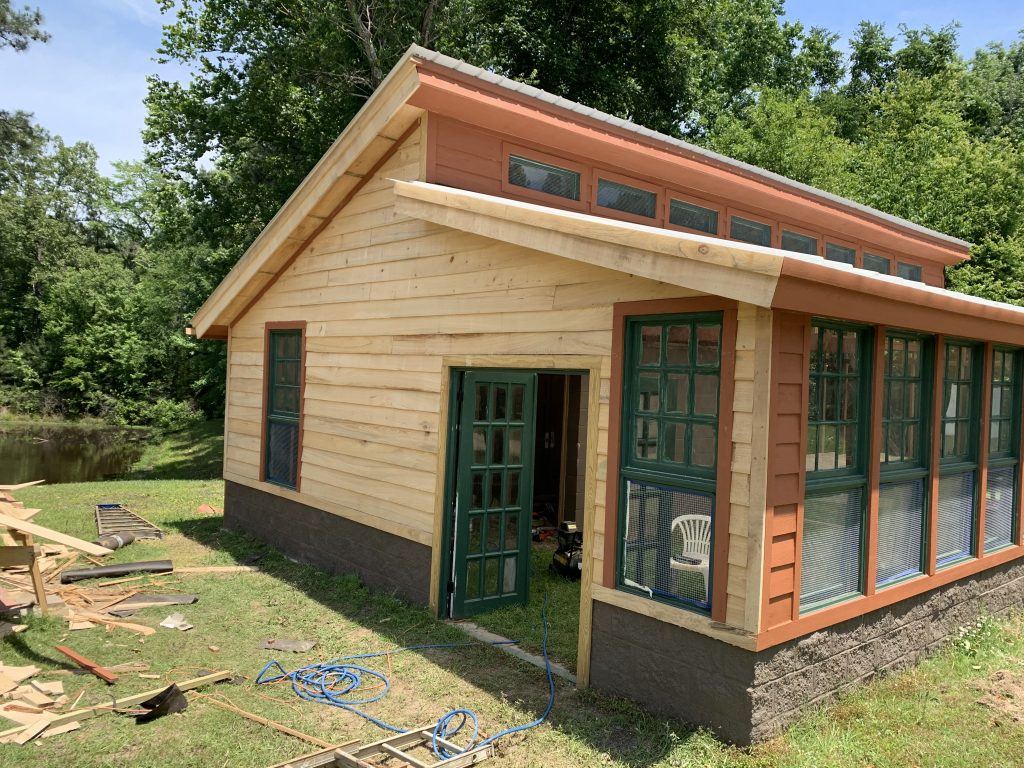
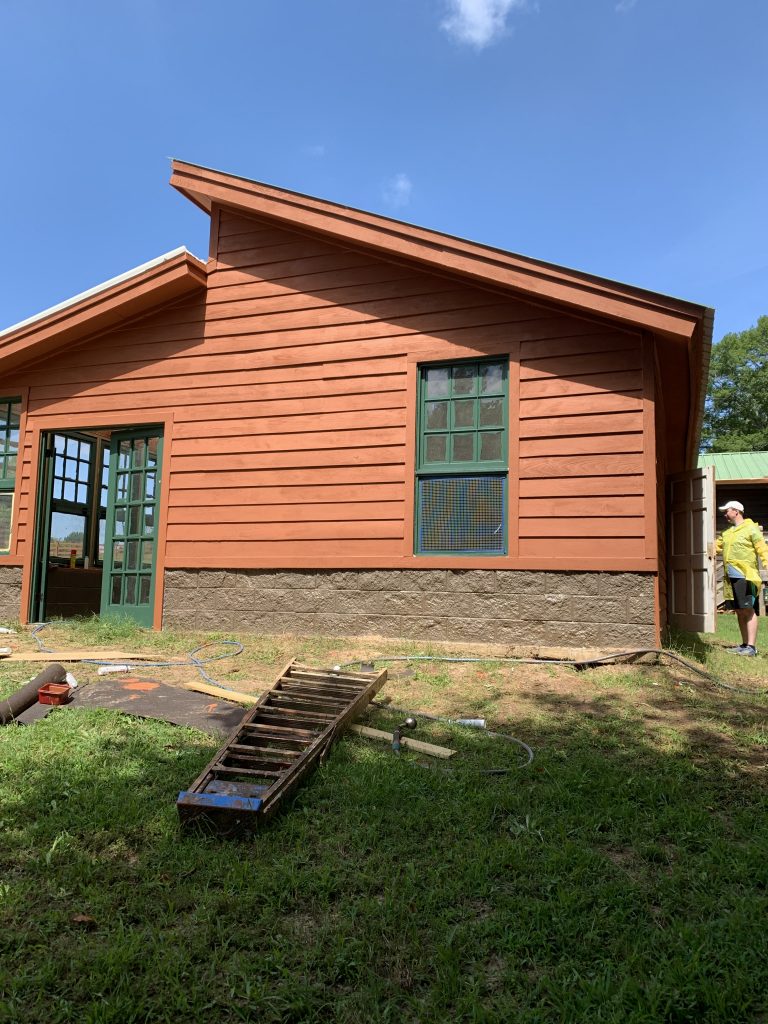
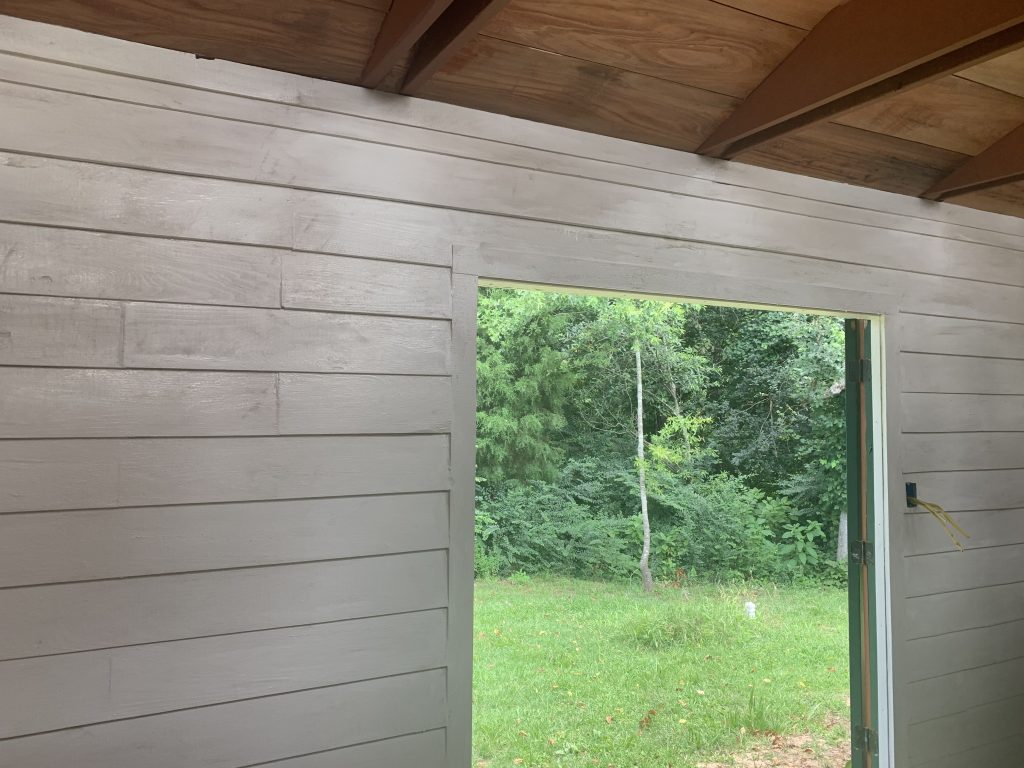
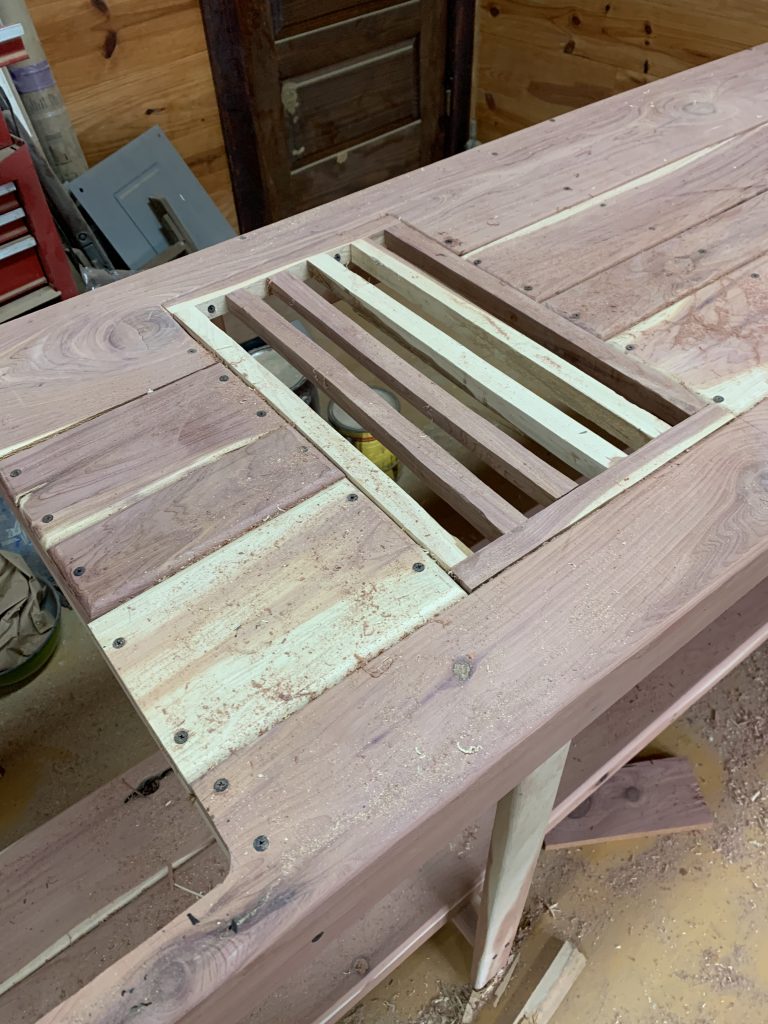
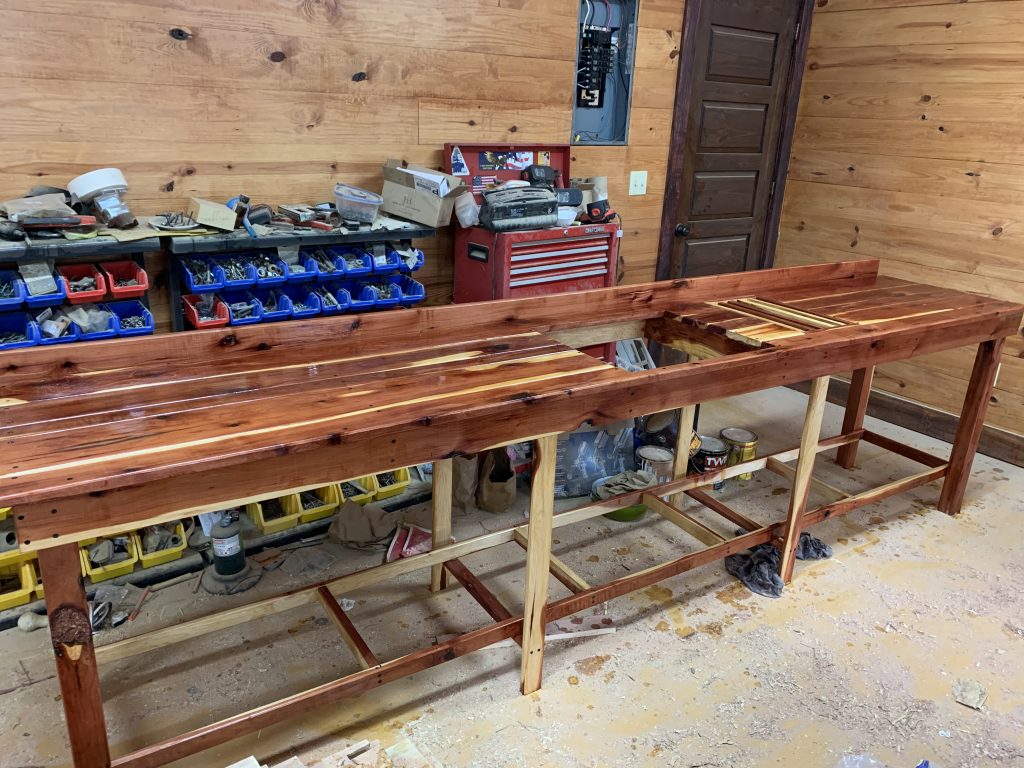
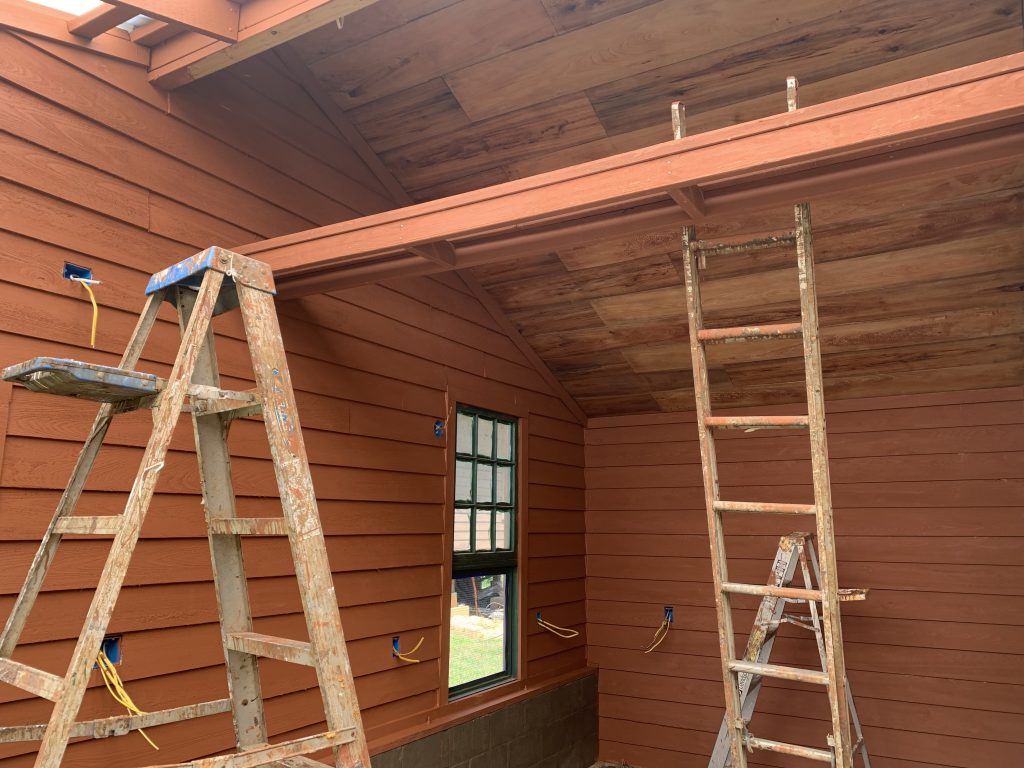
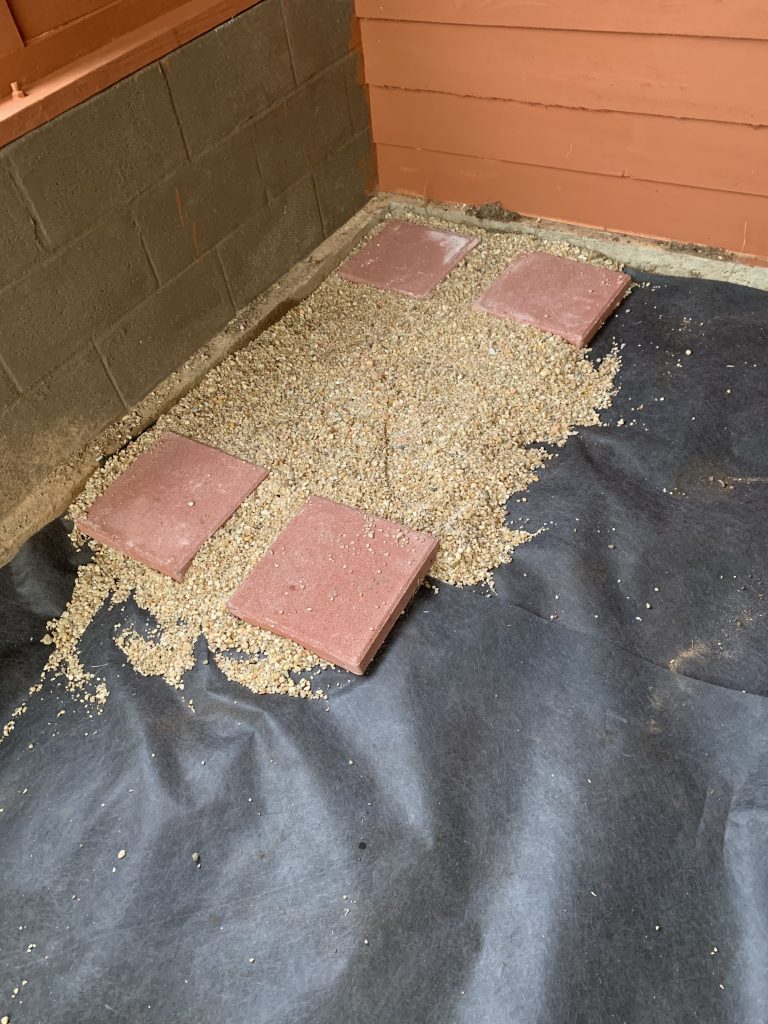
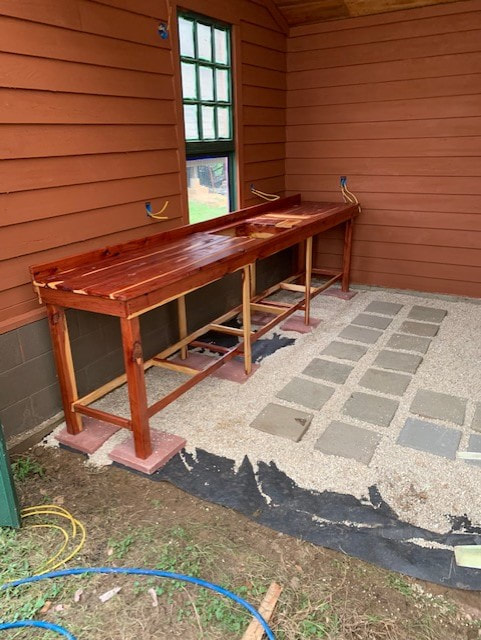
Having a constant supply of food grown yourself brings great satisfaction. Also, producing seedlings for your landscape needs in large quantities is kind to the budget. Being less dependent on food sources far from home saves shipping costs, store overhead cost, and YOUR time traveling to get food you need! There is great benefit in growing your own plants, including taste due to freshness of your own homegrown produce. Another is the nutritional benefit from food grown in your own greenhouse! The Proposed Greenhouse Design  This is a major project I've just completed, but still have work to complete furnishing the interior. My REAL job (residential home design ... planshoppe.net) keeps me occupied most of the time, and it took longer than expected to complete. I've built it almost entirely on my own, except for a couple of tasks that I just didn't want to take on at my age. Anyway, the plan was to build a large greenhouse (36' x 24') down here in Louisiana to take advantage of our mild winters. I hope to begin seedlings for our yard, and then vegetables and citrus in the future. I just completed a concrete driveway, and had to wait until it was put in so that I could plant shrubbery in the right places. A few years back was the right time to take the plunge and just do it. It will hopefully serve my wife and I for all our remaining years, and the next few generations to come. Passive solar design simply means that the greenhouse does not require an active heating system. It uses the heat from direct sunlight collected during the day and stores it inside mass, which in this case will be a concrete block wall and barrels of water alongside the wall. The heat will slowly be dissipated back into the interior area at night, keeping the temperature (hopefully) above freezing. If the temperature in my area stays below freezing for an extended length of time, I’ve installed a backup propane heater for heat. The upper windows will open for venting during the unbearably hot summers here. They also have screen on them to prevent predators from coming inside. The rear storage room will be for my mowers and yard tools, as well as fishing supplies for my pond which is behind the building. ASSEMBLING WINDOWS AND DOORS Over the year prior to beginning, I collected quite a number of same sized wooden window sashes: Same Size Thrift Store Wooden Window Sashes I started the project by assembling them into 1x4 treated pine frames, screwed and glued together with Titebond II wood glue. It's a glue made for exterior application, and works well for projects like this one. The lower sash will fold up inside onto the upper sash for air circulation in the summer. The lower sash pieces I found were single pane, and the upper were 9 lite divided panes. (Actually I didn't find quite enough lower sashes, and so I made some to match out of treated pine and had 1/8" glass cut to size.) If I had to do this again, I'd use all large single pane glass, since the individual pieces are a PAIN to paint! This first photo shows the window frame being assembled with the outside face up. It will be necessary if you build something similar to adjust the frame size to fit your sashes. That's why dimensions aren't so important to give here since you can build one any size you want. I was just fortunate to find so many old sashes the same size. Treated Wood Window Frames With 1/2" Fixed Wire Screens I used treated lumber for the window and door frames, as well as the front framing, which will all be exposed to constant water and humidity. I also found some old doors in downtown West Monroe, Louisiana at antique alley. This is where Mrs. Kay’s Sweet shop is located….from Duck Dynasty! By assembling the windows before framing the greenhouse, I would now know the rough opening sizes I’ll need. I had to replace some broken glass and fill some old holes with wood plugs and glue, but once they are finished, it will be hard to tell they were any other way! Here’s some of them: Assembled Windows Before and After Painting Here's a photo of the doors getting the first coat of paint. The plan is to paint only one coat and add a second once they are in place. The trim around the openings will be a cedar color, and this makes it a LOT easier to do a second coat without having to be so precise in cutting in between colors: Old Wooden French Doors Being Painted I had to make the upper vent windows in my shop, along with some of the lower glass frames in some of the main windows as I said before. Here are a few construction photos of the upper smaller vent windows I made: Making Vent Windows From Treated Pine A completed Vent Window I know they look a bit rough, but a second coat will do wonders once they are installed. FOUNDATION My 1943 Ford 9n Tractor Here is a photo of the area where the greenhouse will be. South is to the right: Leveling and De-Grassing the Site  Forms were built around the perimeter for the footings and storage slab area. The footings were 18″ wide. Our frost line is 4″ so the footings were not very deep. I ran 2 re-bars along the footings for reinforcement, and used wire mesh in the storage slab area. I also dug the center footing deeper due to the weight of the interior block trombe wall. (The forms are not completed in this photo.) Beginning the Concrete Forms  Then the concrete work was poured. I went and got a few 8"x8'x16" concrete blocks as I went along for the next step. The outside facing of the blocks I used on the greenhouse had a texture on them (a bit more expensive) and the trombe wall blocks were standard. I decided to use the textured blocks for a nicer finished look. Later I painted them a natural rock color which is found all around my place. The Completed Concrete Foundation  Next, work began on the center trombe wall and three block high walls along the front and half way down the sides. The rear wall will be full height and insulated since it faces north. As we went along, we poured gravel into all the block voids to build up more mass to retain heat. We also placed 1/2" x 8" anchor bolts about every 6' along the top of each completed wall sticking out about 2 1/2" to be able to bolt down the 2"x8" treated sill plates. Then we braced the trombe wall to prevent it from toppling over with strong wind until the framing was installed to brace it. The trombe wall along with barrels of water set alongside will retain the heat of the day, and release it during the night. Here is a photo of them going up: Block Work Being Done A treated 2″x8″ sill was then bolted to the block top to allow for framing to be attached. Here is a photo of the completed block walls. Notice the textured blocks on the outside. Cool look, don't you think? :) The Completed Block Work  FRAMING THE GREENHOUSE Next, I began to stand up the perimeter walls. I think I made them 6' high. I used treated lumber for all the framing in order to prevent rot due to interior moisture. The walls are 2"x4"s at 16" centers. Here’s a few photos: Framing the Walls Here is a picture of the way I assembled the side walls working alone. I simply placed a couple of saw horses to support the top plate until I got a few studs nailed on. The distance between the window openings is really tight side to side in order to make the finished front trim look nice. Saw Horses Used to Support Framing Walls After the walls were up, I added some double 2″x10″ joists that I cantilevered about 3' to support an upper center wall and attic pathway. I also angled the exposed ends in the middle to get a nice finished look, and also pre-painted them on the ground before. Trust me, that's the easy way to paint ... right in front of my face, and not on top of my face. Hey, I like my face without brown splotches on it! Next I added some serious metal strapping to hold the joists to the rear wall top plate. I also strapped the rear storage wall down to the bottom plate. I didn't want the weight of the roof to cause the cantilevered area to sag. The 2"x4" pathway above was added next with three 2"x4"s flat with about a 1/2" spacing between. You can see in the picture the 2"x4"s added along the underside of the pathway for bracing. I’ll use it to walk on and open and close the vent windows twice a year. Storage Area Ceiling Joists and Pathway Framing  Then I stood up some upper support walls….not fun to do alone! The Center Upper Support Wall (Framed For Vent Windows) The rear rafters were then installed (2"x6"s @ 24" centers), and a metal roof added. I then framed in the two gable ends with 2"x4"s The roof pitch on the rear metal roof is 5 : 12, and the front roof pitch with the clear panels is 3 : 12. You can adjust it to whatever slope you need. The rear solid metal roof prevents the sunlight entering during the summer months. The clear roof glazing area is along the front half, south facing growing area. Rear Roof Rafter Framing Metal Roof Installed On Rear Rafters The fellows that installed the metal for me commented about how stout the roof was they were on! Made my day. The next step was to add the front rafters. First, I installed a 2"x6" on the upper center wall a few inches below the upper vent windows all the way across the 36' building. Next I laid a 2"x6" over an end wall and made a pattern for the 2"x6" rafters and then cut them all. BEFORE I installed them, I painted all the pieces. Did I already say why? I didn't put on the clear panels until the rest of the building was finished. There are no joists in the front to allow for maximum ceiling height for tall plants and short trees. This braced the front window wall well since the rear area is bolted to the block wall which anchors everything. I installed the upper front rafter flashing though at the top that the panels would slide underneath later. The flat 2"x4" runners for the clear roof panels were nailed onto the rafters, pre-painted of course. Here's a picture of the rafters in place: Front Rafters Installed SAWING THE SIDING AND TRIM My sister recently had some acreage harvested, and down in the creek bottom were some large cypress trees….perfect for the greenhouse! The logger laid three huge trees in a clearing about a mile from me down a long double rut dirt road. Here is a photo of two of the trees: Cypress Logs Harvested Nearby I cut the long trunks into 12′ and 8′ long sections in order to pull them back home. I began dragging the nine log sections with my tractor. The poor thing strained its guts out pulling the long, water laden, extremely heavy monsters back home down the road: Dragging the Logs Home Next I began cutting the logs into the dimensional lumber pieces that I needed on the bandsaw mill. Turning those huge logs is TOUGH by yourself on a manual mill, but I persevered. I had to use the winch some in order to turn them as I cut. Of course it gets easier as you go. Cutting Cypress Into Dimensional Lumber Making 8" Wide Beveled Lap Siding Well! Would 'ya look-ie thar! I see mah greenhouse a growin' out the ground behind that thar sawmill in the pitcher!! Ahem. Sorry. On the right is a closeup of some siding being cut. I placed a couple of 3/8″ thick small sticks under the one edge of the 8" wide cant to lift it, and take a cut. Then I removed them for the next cut, and achieved a consistent beveled thickness for the finished siding. I took a photo of some of the siding stacked into the dry kiln in preparation for drying a full load. I ended up not needing the siding for a while since my real job once again got in the way. By the time I got back to needing the siding, it was already dry enough with the heat naturally generated inside the kiln with no fans circulating! Here's a picture: Lap siding in My Solar Dry Kiln A few days before I began installing the exterior boards, I unloaded the kiln and stacked the boards under my carport to use. Less than a WEEK later, after they sat inside the kiln for MONTHS, a strong and nasty storm blew through here producing 80 mph straight line winds. The kiln was blown off its block supports. The Damaged Dry Kiln  To be honest though, I’d planned on moving the thing to the rear of the barn one day when I built it, and made it tow-able. I figured it was God’s way of letting me know the time had come to move it, so I went with it! The photo above shows the roof hail damage. It had been in the same place for almost 10 years. Here is a photo of my cousin helping me (or really, me helping him since he knew what he was doing) put the tires on the axle: Installing Wheels On the Kiln To Move That's my old Chevy van backed up to tow it to the back…first time I’ve ever moved the kiln, and it did perfectly! Anyway, in order to back it into the tight area where it needed to be, my van ended up almost perpendicular to the kiln. Danny (my cousin) kept hollering at me which way to cut my wheels in order to do such a perfect, and tricky maneuver. He drove an 18 wheeler, and taught big rig driving at the local voc-tech. It was a cool experience. Anyway, here is a photo of it in its new home, all leveled up and ready to use. We removed the axle and hitch I'd installed when it was originally built (See Solar Dry Kiln Post) since it now had a permanent home. The area is not quite as ideal a location as before with total sun, but I think it’s good enough to do the job: Solar Dry Kiln's New Location INSTALLING THE SIDING AND TRIM Now back to the siding. I began on the rear wall. My cousin and I dragged the double door units from my shop to the rear storage opening and nailed them into place the same day we moved the kiln. They were too heavy to move alone. Later, I began to nail on the cornice boards. I had cut some 1/2″ thick x 12″ wide cypress to use underneath the overhang after a coat of paint, as well as the 1″x8″ fascia and 1″x4″ trim boards. The 1″x4″ trim was installed next to the metal roof. Here's a closeup of the cornice: Installing the 1"x8" and 1"x4" Fascia Trim Boards  Yeah, I see the errant nail. Guess that's why my hammer came with a claw on it. When I put on the 2″x4″ runners to screw the roofing to over the rafters, I let them extend about 3/4″ past the rafters. That is visible in the photo since the end overhang is not yet complete. This enabled me to install the 1"x8" fascia boards alone by shoving them up and holding them in position with one hand while nailing with the other. It was not fun, but it worked well! When I installed the 8" wide lap siding, I allowed 6 1/2″ exposure to each new row. This provided a lap of around 1 1/2″ for each row. I used an inexpensive harbor freight staple gun for the siding, and it actually worked great! I first applied a layer of 15# felt underlayment to the exterior walls before applying all the siding. Then I nailed on the end 1″x4″ corner boards. Here's some progress photos: Installing and Painting the Exterior Siding Next I began the upper wall area which I had been dreading doing alone. I laid some scaffold boards over the rafters to walk on while working. Once again I installed the cornice boards, then caulked and painted as before. I put felt on the wall, and then nailed on some flashing (mentioned earlier) I'd made with the correct pitch, allowing 1 1/4″ clearance for the roofing panels to be installed later. I brought the windows up one by one and installed them. Then I installed the siding and finally, caulked and painted the entire area: Once again I installed the cornice boards, then caulked and painted as before. I was HAPPY that headache was OVER! Then I moved to the front side and installed the cornice. Here is a progress photo showing the upper area finished along with the front cornice: Finished Front Upper Vent Window Wall  Finally it was time to begin the front window wall installation. I screwed the first unit in the center of the front first in order to give me some play if I needed to sledge hammer the vertical double stud over a bit to make it go in. I’m glad I did it that way, since I DID have to knock a few over a fraction to wedge them all in. I had allowed 1/4″ clearance side to side rough opening, and that was a bit close for a couple of them since wood swells with moisture. Here is the first one in place: Installing the First Window Installed Front Windows Then I then added felt over the remaining exposed side, including a strip between windows: Applying the Front Felt Next I added some pre-painted trim pieces and small bits of siding on the ends. The reason I pre-painted the trim was so that I did not have to be so precise when adding a second coat cutting in between paint colors. Here is a photo of the caulked and painted, finished front product It's finally starting to look like a greenhouse! Finished Front Wall Next, I began working on the ends. First, I installed the doors and windows. I worked on one end at the time in order not to be toting setups from one end to the other since I am working alone. I then added felt over all the siding areas. After installing the felt, a bad storm blew through and took a lot of the felt off! Oh well. Felt Applied On End Wall Next I began installing the corner trim boards followed by the cypress lap siding. And lastly, I installed the soffit boards BY MYSELF. I believe I nailed a board horizontally along the outside front and rear wall so that all I had to do was hold up the opposite end and start nailing. It worked quite well…..except for me smashing my finger with the hammer due to an awkward angle when the hammer glanced off a large nail and caught my finger. You talk about hurt for a few days! A Left End Before Painting The Finished Right End COMPLETING THE INSIDE SIDING AND WALLS I moved inside, and began first by working on roughing in the electrical. I'd placed a 1" pipe under the footings before pouring the concrete foundation for the wire from the house. The electrical feed wire could then run to the greenhouse and be tied in later. I installed the outlets about 3′ above the floor area to provide easy access after the benches and plants were installed. Then I installed some ceiling and wall light boxes where I thought they would do best. I carefully placed a couple of outlets on the cantilevered joists above and concealed the wire for two fans. Once all the electrical wire was run (12/2 with ground) I insulated the ceiling on the rear half of the greenhouse with R-19 faced batts. Of course the front greenhouse rafters have no insulation, only the translucent panels on top. Next I insulated all the remaining perimeter walls with R-11 batts, including the entire rear wall (along with the storage room rear wall). Then I began to work on finishing the rear center storage room completely. (We’ve always been crowded by lawn mowers and tools in our garage for years. So I wanted to go ahead and do the storage room first to get them where they belong….out of our way.) Back in my shop, I began running some 1/2″ x 12″ wide cypress rough-sawn boards through my old Sears Belsaw planer, and surfaced one face (side) only….no need to have the back side smooth. I think the final thickness ended up a little over 3/8″. Next, I used minwax polyshades to brush on a stain/varnish. It only took one coat, which made it a quick process.This made the boards easy to hold above my head. Then, using my harbor freight staple gun, I secured them into place with 1 1/4″ staples. I placed 1×4 trim around the rear doors and the interior access door first and then applied the siding on the 3 sides. This is the same siding used on the exterior. I decided on doing this since there will be constant watering going on inside of the plantings. The 4th side of the storage is the back side of the block trombe wall. Here’s a picture of the first ceiling board installed: Installing the First Cypress 1/2" Ceiling Board The wall above has not yet been insulated, but it was prior to the interior lap siding being applied. The next photo shows the completed ceiling boards, along with the wall lap siding being applied. Interior Siding Being Installed After all the ceiling and siding was complete, I painted the interior, including the rear of the concrete trombe block wall: The Completed Storage Room (Electrical Not Yet Installed) As you can see, the walls in the storage room are painted white so I can see items more easily inside. The greenhouse area walls will be the cedar color used on the exterior. This color combination in the storage of white walls, cedar exposed beams, and oak stained ceiling boards made me wish folks could see it from inside the greenhouse, since it looked so cool. Hey .... I was happy! I then moved to the greenhouse area, and began installing the ceiling boards, followed by siding in the area where a sink cabinet will be. I’ll use the sink area for potting, as well as canning in the future. I have outlets for an electric element to boil water on the counter-top also. After getting some of the siding up, I painted it so that I could install the cabinet, since my plumber was scheduled to come and install the sink for me. Did I mention I HATE plumbing? This is because EVERY time I do something, it leaks. “A man has got to know his limitations”….done in my best Dirty Harry voice. So a plumber bill was necessary. After that, I began working on the cabinet itself in my shop. I used eastern red cedar, which we have in abundance around here, and since I already had a bunch in my lumber storage shed. It ended up about 11′ long, and so to was a bit heavy to tote into place, I left even left the bottom shelf boards off to help a bit, which it did. My brother-in-law Michael came over and helped me move it into place. Thanks Bro! Here’s a few photos of it being built. Note the open grate on the right of the sink. This is so that I can place a waste basket underneath on the lower shelf to use for handy disposal when cutting items for canning: Cedar Sink Base Cabinet Sorry about the messy shop! What can I say. I do clean it regularly, and sometimes it looks really good. If I were a big outfit, of course I'd have folks to do that for me. But this is the real world folks. But I digress. I added a couple of coats of satin polyurethane for the finish. The bottom shelf boards aren't shown here since I left them off until it was in place. After the storage room was complete, I moved to the interior greenhouse area and applied the remaining ceiling and siding boards. I caulked all the joints and bad spots on the rough lumber, and painted the entire area. Here's more progress photos: Completing the Interior Greenhouse Walls And Ceiling I began leveling the dirt floor to about 2" below the slab height. Then I applied a small bags of pea gravel. It took a lot of loads in my old van to complete the whole area due to the weight. I also bought a lot of 12"x12" x 2" thick concrete pad blocks for pathways and cabinet supports. Then I leveled out the area where the cabinet would be placed, and added a landscape fabric. I placed some 12″x12″ concrete pads where it would be located and where the walkways would be. And finally, I added pea gravel in between all the other floor areas. The plumber then came and installed the sink. Applying Floor Fabric, Stone, and Blocks The Sink Cabinet In Place And here's the completed interior. The trombe wall is to the left. The sun rays in the winter shine through the ceiling and hit the wall, heating it up with the dark color. You can also see the red colored floor blocks in front of it. That's where the black barrels of water will be. They will also act as heat storage for the large area. Two fans were added above for air circulation. I've also added a propane ceiling heater since these were taken for backup heat when needed. The Completed Interior And that's how I spent my summer vacation! Not really. :) It took off and on a couple of years to complete the project, since I work mostly alone. By doing the work myself, and even cutting most of the lumber for the project, I was able to pay as I went. That's the way I like to do things in order to avoid debt. I certainly appreciate you hanging in there with me to the end. It was actually a great and satisfying project to take on, although sometimes challenging. I would encourage you to build a greenhouse. Maybe not on such a grand scale as this, but to do one for the lifetime benefit it will provide to you and your family's health. You'll know what's actually IN the food you're eating, and you'll be able to have year-round fresh food. Thanks for reading!
1 Comment
3/3/2025 05:30:00 am
Love this! A passive solar greenhouse is such a smart and sustainable way to grow plants year-round. Your journey and insights are truly inspiring. Looking forward to seeing how it evolves! Thanks for sharing your experience.
Reply
Leave a Reply. |
GARY SAVAGEGary is a residential designer with many other interests. Woodworking, music, the JFK assassination, the bible and writing occupy most of his day. He and his wife Jenny live in northern Louisiana. ArchivesCategories |






















 RSS Feed