PLANTER BOX
This is a simple project, suited for the beginner in woodworking. Simple hand tools will suffice, although access to a table saw would be beneficial. Besides the simple beauty, it can be used indoors or out. A durable finish would be required for outside use and exposure to soil.
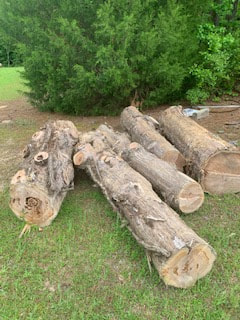
Wood selection is important. Any species resistant to rot or a treated wood will stand up to the elements and last for years. Shown here is Eastern Red Cedar, which is readily available nearby on my homestead. I've built many small exterior projects with it, and it lasts for years. The contrast between the heart and sap areas create a beautiful grain pattern that never gets old to my eye. I used a poly finish on all areas of the finished project for another layer of protection.
If used indoors, a couple of small 1" square sticks can be placed on the bottom before adding in a potted plant container. This gives a small space for drainage below which allows seepage to drain freely through the 1" center hole drilled in the bottom of the planter.
If used outdoors, the planter should be lined with a landscape fabric to avoid direct contact of soil to wood. Although not totally necessary, this additional step adds one more layer of protection from mother nature. So, along with a rot resistant wood, a few coats of exterior grade poly or paint of choice, and a lining of landscape fabric, the planter should last many years to come.
The size of the interior box is 12" square, but could be adjusted to 18", or even 22". Of course the height should be adjusted accordingly. Its also a good idea to build at least two at a time in order to have a nice pair (for the sides of your front door, for instance.)
Eastern Red Cedar logs
(Small cedar tree in background)
(Small cedar tree in background)
Begin by selecting your wood. As stated, I chose cedar for its rot resisting qualities and beauty. Having a mill gives me the advantage not available to most, and so after rough cutting the lumber from the logs, I surface planed the stock to 3/4" thickness. Just look for lumber surfaced to 3/4", although this could be slightly thicker if desired. Just adjust the dimensions to your size.
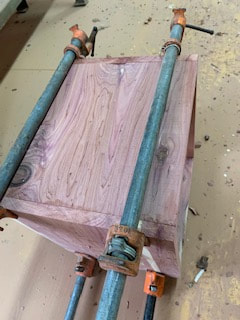
The first section to cut and assemble are the sides of the planter box. I used a finished height of 11 1/4", although you can adjust a bit deeper if you'd like. A stock lumber yard 1"x12" will be 3/4" thick, and the perfect size for these four pieces. Simply cut two pieces 12" long, and two pieces 13 1/2" long. A butt joint is sufficient at the corners, since the added legs will give added strength. Apply exterior wood glue before nailing or screwing the box together as shown below. Use exterior 1 1/4" deck screws and pre-drill all holes. Clamping the freshly glued and screwed (or nailed) joints will give a more secure permanent connection:
After the glue dries, cut four 3/4" x 3/4" x 12" long cleats. These will be used to support the bottom of the planter. Test fit the first cleat flush with the inside bottom of one side, and secure with glue and screws (or 1 1/4" finish nails which I prefer here.) Then cut to length the following three and secure. Below shows the first cleat in place:
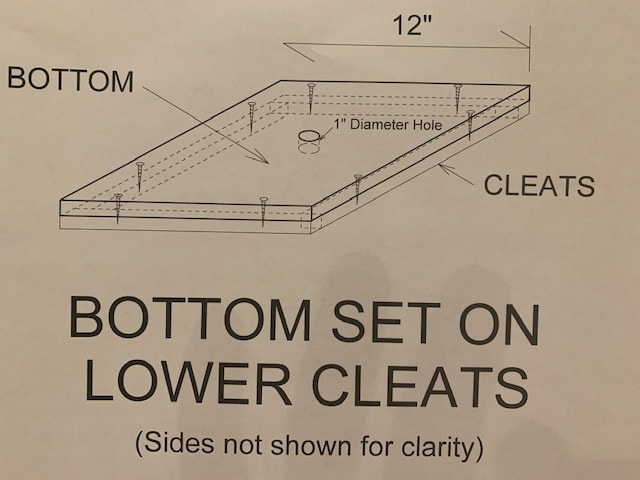
After the four cleats are in place, turn the box upright. Cut the bottom piece 12" x 12" x 3/4", and then test fit. Trim as needed to fit snugly, resting on the four cleats below. After fitting, remove and drill a 1" hole in the center for plant drainage before installing. Then re-position into place, pre-drill and screw into place. Do not apply glue! This makes the bottom removable for replacement in the future if ever necessary.
Next cut the eight leg pieces. Cut four pieces 2 1/4" x 15 1/4" x 3/4" and four pieces 1 1/2" x 15 1/4" x 3/4". I like to round the exposed corners with a 1/4" router bit to avoid sharp edges. Be sure to select the best face to show, and round only the exposed corners. In other words, on the 1 1/2" wide pieces, round only one 15 1/4" long corner. On the four 2 1/4" pieces, round two corners on the same best face side. If you don't own a router, round the chosen edges with sandpaper a bit.
Next, glue and nail (using 1 1/4" finish nails) the four 1 1/2" wide pieces to each of the four corners of the planter sides, keeping the top of each leg flush with the top of the box. Then apply the remaining 2 1/4" pieces to complete the four leg assemblies. I like to nail into the box as well as into the adjacent leg piece for strength. Be sure to apply glue between all connecting surfaces.
The last step is to cut and apply the top four trim pieces. Cut 4 pieces 2 1/4" x 16 1/2" x 3/4". Once again, round over the best face side top corner edges. Next cut a 45 degree on both ends, making a picture frame effect. Glue and nail each piece into place, carefully matching the angle cuts together for a tight fit. Finally, set all the exposed nails with a nail set and fill with wood filler. Sand the entire piece thoroughly for a smooth surface for finishing. Apply finish as desired. Congratulations!


